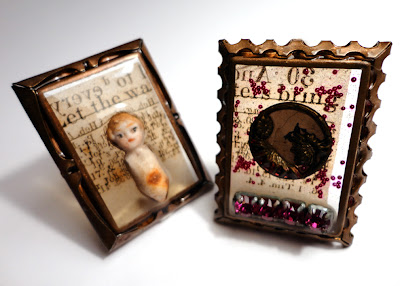
I have had more than a few questions about working in frames and open back bezels.
These two copper frames came home with me from Paris. I knew I would do something special with them one day.
The frame can become a bezel by simply covering the back in tape. I use red line double sided tape which is super strong. But I have used packing tape in a pinch.
After I am sure the tape is firmly attached, I flip the frame over and add a small amount of resin to this new bezel. To do this project you need to think about two resin pours.
I add a small piece of text to this first layer of wet resin. The paper becomes very translucent. I let this cure overnight.
I try and wait at least 24 hours so that this resin is solid. If I pull the tape off too soon and the resin is soft, it pulls away with the tape and the frame loses its shape.
If you did not burnish your tape down properly you may not get a perfect back. See the bottom left corner? The resin is not flat. You can fix this by pouring another layer to create a perfect dome. I would do that if this was going to be a necklace. You now have a bezel that looks like it has a solid glass back.
The fun begins when you take the frames, after the first pour and add your embellishments. Then you can pour resin right to the brim to keep your items solidly in place. For the first frame I added this vintage German dolly.
I had a vintage button and some rhinestones to add to the second frame. I also added some glass beads to the resin during the second pour. I love how these open back frames are now see-through pendants.
Here is one of my finished brooches with an open back bezel.
Labels: Bezels and Other Components, Envirotex Lite, Pouring, Tutorial
