EnviroTex Lite is such an amazing product! I picked up some inexpensive pictures to experiment with and I love the results...
I gathered my supplies which included several colors of ultra fine glitter and
EnviroTex Lite.
I used a toothpick and craft glue, that dries clear, to outline the areas I wanted to highlight with glitter.
I sprinkled on a generous amount of glitter...
and continued with each color of glitter until I was happy with the coverage. Once the glitter was dry I put some painters tape onto the beck side of the picture.
I measured out 1 ounce of each the hardener and resin and stirred them together for 2 minutes.
Then, I poured them into a second cup and stirred for another minute.
I poured the resin over the picture.
I used my stir stick to gently move the resin to the corners of the picture.
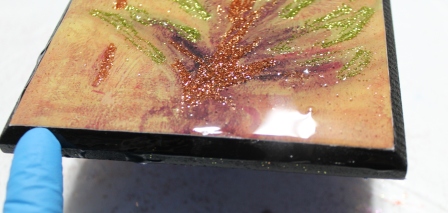
Using a glove, I ran my finger over the edge to catch the drip and cover the edge with a light coat of the resin.
A lighter was used to remove the air bubbles as they rose to the surface. Then, I let it set for 24 hours.
I removed the painters tape from the back of the picture. This works well to catch the drips of resin and keep the back side of the picture clean.
You can see it better in this photo...I love all of that shine!
Labels: Ann Butler, Art Glitter, Envirotex Lite, Home Decor