Until you have a uniform color.
Press an item into the Silicone Putty
Wait 20 minutes and remove
and you have created a mold...Be sure and wait 48 hours before using the mold with reisn to get perfect results...
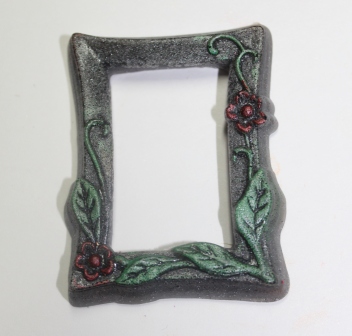
Now the resin pieces I end up with are not always in colors I want, since I am just trying not to wast any of the resin left over from other project. So after I have a collection of resin pieces I will take time to color them in different ways...today I am using a rub on wax to give some color to these resin frames.
It is an easy process...
just rub the color onto to the resin...
and you will have some great pieces to use in your projects in the colors you will use.
This is also a good way to test the mold, make sure it has all the detail of the original...this is one of my favorites...and once I added the green for the leaves and red for the flowers....this piece is stunning! Be sure and spray these pieces with a light coat of
Castin' Craft Resin Spray to finish off these embellishments!