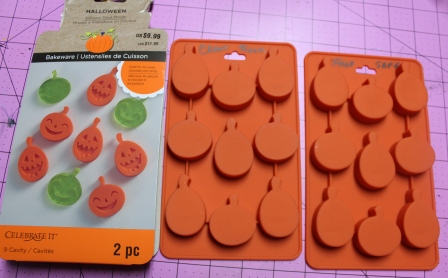
I am always looking for new molds to use in my projects...while at Michael's this week I found a couple
one was this pumpkin silcone mold for candy...it came packaged with two of them, so the first thing I did was mark the back of them, one with Craft Room, the other I marked Food Safe. This is so that I would have one to use in the kitchen if I ever wanted to, as once you use molds with resins and clay, they would no longer be food safe, so this is an important step.
I started by spraying the mold with
Mold Release and gathered my supplies.
I measured out equal amounts of of A and B.
I mixed them together until I had a uniform color.
I placed the mixture into the mold. I pushed the clay in firmly.
I wanted to use the back side of the mold, as I did not want the faces, I only wanted the pumpkin shape.
I applied glitter to the back side.
I used orange for the pumpkin and green for the stems...I rubbed the glitter in a bit with a paint brush.
I let the pumpkins set up for about 30 minutes...which made it easier to remove them from the mold.
I like how they turned out...this was a quick and easy project!
Labels: Ann Butler, EasySculpt Epoxy Molding Clay, Glitter, Pumpkins