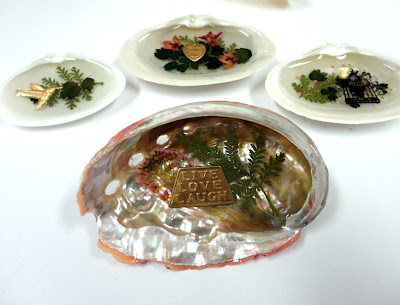
This will be my final shell post for now. I am so happy to end this series with a very special finished piece.
This shell had three pours of Envirotex Lite so that my dried flowers, leaves and charms would look as though they were suspended in water.
These shells do come with holes though...a little tricky to work with if you want to pour resin into them.
I tape my holes with very strong double-sided tape. This tape is called "red line" and is sold in most craft stores in either rolls or sheets. It is super strong and much more expensive than regular everyday double sided tape. I only use it for important jobs like open backed bezels or things like the shell I am demonstrating today.
I simply covered the holes with the tape and really made sure it was attached. As you can see from the final piece, it really did the job.
I did want to point out some repairs I made. I decided to glaze the back of the shell after I completed the inside work. See how the glaze at the back pooled at the bottom of the shell? I only noticed this in the morning. These "pools of resin" were easy to remove, I just peeled them away. This is very easy to do when the resin is not completely cured and still "soft" at the 12 hour cure stage.
Hope you enjoyed shells and leaves week!
Labels: Dried Flowers, Envirotex Lite, Repair Work, Shells
